


 Select your language:

How to Diffuse Curly Hair: Tips and Tricks to Get Rid of Frizz


Curly hair is prone to frizz, making it difficult to maintain a smooth, polished look throughout the day. Learn a step-by-step guide on how to diffuse curly hair to achieve beautiful, bouncy, and voluminous curls.
While curly hair can be stunning, maintaining it can be challenging. If you have curls, you know it can take long drying times to define them, but it doesn’t have to be this way.
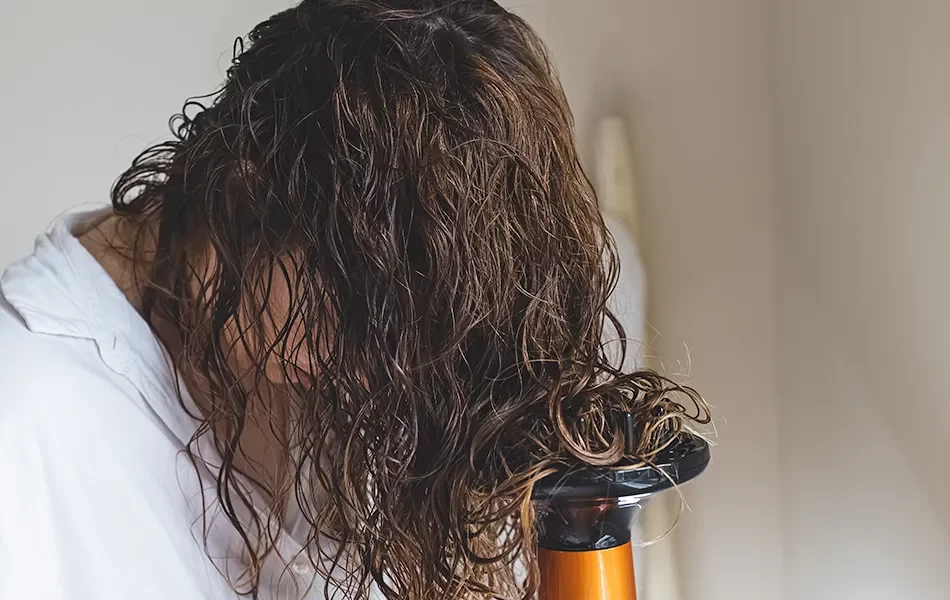
One approach to enhance and define natural curls is using a diffuser, a blow dryer attachment, that helps dry your natural hair without disturbing the curl structure.
Diffusing curly hair is a great way to add volume and shape without using harmful heat tools, and it’s a method all types of curly hair can use.
Using a diffuser, however, requires some skills and knowledge to achieve optimum results.
Discover how to diffuse your curly hair, the best techniques to use, including the right products and common mistakes to avoid, so you can achieve beautifully defined curls every time.
How to Diffuse Curly Hair Like a Pro
Diffusing curly hair starts with clean hair, free of product buildup, and patting it dry with a microfiber towel or T-shirt. Apply curl-enhancing products, such as a leave-in conditioner, curl cream, or gel, to wet hair and then let it air dry for 20–30 minutes.
Massage your scalp to help distribute the product evenly throughout your hair. Then use a diffuser attachment on your hair dryer to distribute the heat evenly and prevent frizz.
You will need to section your hair and work on one section at a time. Flip your head upside down and put your curls into the diffuser, lifting them towards your scalp. Before your hair is dry, avoid touching it too much to prevent frizz. Use a finishing spray to keep your curls in place.
What does a diffuser do?
A hair diffuser is a tool that is used to dry curly hair. It works by dispersing airflow when attached to the end of a blow dryer. This helps lower the heat’s intensity and avoid hot patches that may damage hair. Usually, it comprises a flat, spherical attachment with fingers or prongs that protrude from the surface.
Besides lifting and separating the hair, the fingers or prongs on the diffuser can also enhance natural curls and waves while preventing frizzy hair. By distributing heat and air evenly, the blow dryer diffuser can help produce a more voluminous, natural-looking hairdo that appears softer and more defined.
Best Way to Diffuse Curly Hair: 5 Easy Steps to Follow
When done right, hair diffusing can help you achieve beautiful, bouncy curls without spending hours drying them. Discover 5 easy steps you can follow to diffuse your curly hair and get the perfect look.
#1 Prepare your hair
The most important diffusing tip is to start with properly prepped hair, beginning when you get into the shower. Shampoo and condition your hair with a hydrating formula to moisturize your curls and prepare them for styling.
After shampooing, carefully remove excess water by patting your hair dry with a microfiber towel or T-shirt. Avoid rubbing your hair with the towel, as this might ruin your curls and promote frizz.
Apply a leave-in conditioner to damp hair to provide more moisture and help detangle your curls. Use a wide-tooth comb or your fingers to apply the conditioner to your hair evenly.
Follow up by applying a curl-enhancing styling product on your hair, such as mousse, gel, or cream. This will keep your style in place and help in defining your curls. Leave your hair to air dry for 20–30 minutes before diffusing.
It’s important to also apply a heat protectant to your hair before using the diffuser. Heat protectants have ingredients such as humectants, which hold onto moisture and prevent frizz and reduce the risk of heat damage.
#2 Choose the right heat setting
When diffusing curly hair, choosing the right heat setting is crucial to getting the best results.
Select a heat setting that isn’t too hot or an airflow setting that is too high. The highest heat setting may expose your hair to too much heat, which could harm it and cause dryness, frizz, and breakage. A high airflow setting may get your hair tangled, frizzy, or flyaway.
Remember that keeping the curls from blowing around too much is the goal, and using a high-heat setting will cause long-term damage to your hair. Choosing a low to medium setting with a cool to warm temperature will be best.
#3 Dry in sections
Gather a small section of curls by cupping them into the diffuser without using your fingers. Lift it up toward your scalp in a move similar to scrunching your curls with your hands to add definition. Diffuse each section for 20–30 seconds before moving on to a new section.
Diffusing your hair in sections helps dry and define each curl uniformly without generating frizz or damage. When you diffuse your hair in large chunks, the airflow from the hairdryer can tangle your hair, which leads to uneven drying and frizz. Working in sections also makes getting a defined, voluminous hairdo easier.
#4 Diffuse upside down
Once you feel your hair is almost completely dry, turn your head upside down, and diffuse the roots and underside of your hair until they are fully dry.
Flipping your head upside down naturally lifts your hair away from the scalp, giving your roots volume and lift. This can give your curls or waves a more voluminous, bouncy appearance and avoid flat, limp hair.
Diffusing your hair upside down can also help improve your hair’s natural texture by helping your curls to form and take shape, making them look more polished and less frizzy.
#5 Use a finishing product
Once your hair has dried, consider adding some products, such as styling spray. This will help your hair keep its shape all day long.
Use pomade or shine serum if your hair feels crunchy or bland after drying. Lightly rub some of the pomade or serum into your palms and then massage it on your scalp and hair roots.
How to Use a Diffuser: The Ultimate Guide
Using a diffuser can seem challenging, but with the proper technique, it can help to enhance volume and durability and give you a proper curl definition. Discover more about the different techniques of using a diffuser and a simple how-to for trying it at home.
#1 Hover diffusing
Hover diffusing is holding the blow dryer over your hair while it dries it instead of touching it with the diffuser attachment.
Hovering is the best way of diffusing curly hair since it prevents direct heat exposure to the hair, which can damage the cuticles. And since it’s performed with the head turned sideways or upside down might help produce voluminous curls.
All types of curls can benefit from this technique, but it may be especially helpful for those looking to lengthen or maintain their natural curl pattern. Because gravity naturally stretches our hair out, instead of sticking it to the diffuser bowl, hover the diffuser above your hair to dry your curls without manipulation. Compared to other methods, hover diffusing dries hair without you having to touch it, reducing frizz and maintaining definition.
#2 Upside-down diffusing
Upside-down diffusing is used for maximum volume and root lift.
This method allows you to reach the base of your hair. Simply turn your hair upside down and diffuse it as if you were hovering.
#3 Hammock diffusing
This method is excellent for looser curl patterns that could lengthen due to water weight. You can lay your curls flat on a countertop or use a microfiber towel or a silk scarf. Scoop your hair from the bottom and hold it close to your roots so that your strands are in the towel while your roots are exposed.
Hover diffuse your roots on all sides as you support your hair in the microfiber towel. As your roots begin to dry, lower it and diffuse the next inches of the hair. This will aid in drying them in a more curled, compressed state.
This is a useful technique for keeping your curl pattern intact when drying.
#4 Pixie diffusing
Pixie diffusing is where you “scrunch” your hair with the diffuser. You can perform this technique either right side up or upside down to achieve more volume.
Turn your head upside down, then insert a section of your hair into the diffuser from below. Try to have your hair fall naturally into the diffuser. Lift the diffuser up until it’s in contact with your scalp. Keep the diffuser in place for 3–5 minutes. Continue until you have covered every section.
Pixie diffusing benefits people with all hair types, especially those who want to improve their curl pattern and increase shrinkage.
Curls frequently come out tighter because the hair presses up against the scalp, which prevents gravity from stretching them as they dry. This method can also make your curls last longer by heat “setting” them in a tightened position.
#5 Pick diffusing
Pick diffusing involves using a pick to lift the curls or waves at the roots while you hover or pixie diffuse.
This method helps achieve volume and definition in curls or waves from the roots without causing frizz or damage. The warm air from the diffuser helps speed up the drying process, while the pick allows air to circulate around each curl or wave.
#6 Stretch diffuse
The stretch diffuse method is where the curls are manipulated to dry in a more stretched state. This lessens shrinkage and retains length, which can be a desired look for people with tight, coily hair types.
While your hair is drying, gently pull it downward or outward to lengthen it using the diffuser prongs or your hands. If you aim to reduce the volume and fullness of your hair, holding the hair dryer above your head while stretching your curls downward can help.
Mistakes to Avoid When Diffusing Curly Hair
Some common mistakes to avoid when enhancing curls include using too high heat settings, using too many styling products, touching your hair too much, and skipping pre-diffusing prep.
High heat settings can cause frizz and damage your hair. Ensure you use a low to medium heat setting and dry your hair slowly to achieve the desired results.
Avoid using too many styling products on your hair, as they may weigh down your curls and make them appear limp. Start with a small amount of the product and increase it as needed.
Touching your hair too much before it’s fully dry can also disrupt the curl pattern and create frizz. Let your hair dry completely before touching it.
Make sure you’re diffusing your hair in the direction that your curls naturally fall. Diffusing your hair in the wrong direction can also disrupt the curl pattern.
It’s important to prep your hair properly before diffusing. Make sure you detangle your hair, apply a heat protectant, and scrunch in any styling products.
FAQs
It’s not advisable to diffuse soaking-wet hair. Use a microfiber towel or a T-shirt to pat your hair dry. You can also apply your products and plop/micro plop for 10–15 minutes to help absorb moisture. After that, you can air dry your hair for 30 minutes before you start diffusing.
The ideal heat setting for curly or wavy hair is often between medium and cold. Cool air is the best method to stop past hair damage because it completely removes heat. You can use the medium setting if your hair is healthy.
A diffuser can take about 30 minutes to dry hair from the root to length, depending on your hair’s thickness and the length of your curls.
A Word From a Trichologist
Although diffusers are probably best known to those with curly and wavy hair, they can benefit all hair types because they reduce frizz.
You can also use diffusers to enhance your existing curls or, in some situations, reveal waves you were unaware you had if your hair is normally straight or a little wavy.
Reduced hair damage is another advantage of utilizing a diffuser. Because you are not brushing through your hair, there is less tension on the hair strands, reducing damage.
It’s important to avoid over-drying your hair with a diffuser because doing so can cause frizz and damage. Don’t spend a long time drying each section of hair. Stop diffusing your hair when it’s roughly 80–90% dried, and allow it to finish drying naturally.
Conclusion
You can achieve maximum curl definition using a diffuser. Utilizing proper techniques and products is crucial to avoid damaging your hair or making your curls appear less defined than you would want.
Ensure you use the correct diffuser attachment, get the right heat setting, and apply products that are specifically designed for curly or wavy hair. Taking the time to prep your hair properly and avoid typical errors like touching your hair excessively or speeding the process can also help achieve great results.
With these tips in mind, you may confidently embrace your curly hair and get the lovely, defined curls you’ve always desired.


Hair Loss: What Causes It and How to Stop It for Good
Picking the Best Hair Products of 2024 for Every Hair Type
Haircare 101: Building a Routine